In the times of Industry 4.0, the industrial revolution is set to take industry automation to new heights. Implementing reliable, efficient, and highly advanced control panels is paramount for any plant, industry line, or manufacturing facility aiming to remain competitive and adaptable in the ever-evolving industrial landscape.
In this comprehensive guide, we will divulge the fundamental principles and practices for building a control panel, showcasing how CXControls seamlessly integrates its professional services to offer a comprehensive overview of the control panel building process. Whether you want to learn more about how your plant is run, study the process of control panel building or just curiosity taking effect, this blog will provide everything you need to know to learn the basics of control panel building.
Control Panel Design

The client can provide requirements in the form of a User Requirements Specification (URS) or, if this is not available, through discussions and investigations.
Before diving into the technical aspects, it is crucial to clearly define the control panel’s requirements.
Understanding the industrial or manufacturing process, the industry regulations and any operational safety constraints is a critical pre-requisite to the design stage. Once established we can move on to the functionality required, considering the best technology, cost and programme.
“Researching and defining your requirements thoroughly sets the foundation for a successful build.”
 At this point, several key requirements will be considered including:
What is the primary purpose of the control panel?
Which systems or processes will the control panel oversee or regulate?
What specific functionalities and features are required?
Are there any functional and/or process safety requirements?
Will the Control Panel interface with other systems?
Will data be extracted for key stakeholders?
What are the necessary inputs and outputs for the control panel?
Are there any specific industry standards or regulatory requirements that must be adhered to?
What are the environmental conditions in which the control panel will operate?
Is the area classified under DSEAR/ATEX regulations?
Are there any limitations or constraints to consider during the design and construction process?
What are the expectations in terms of reliability, efficiency, and scalability?
Are there any budgetary constraints?
What are the expected timelines for design, construction, and implementation?
Are there any future expansion plans or scalability requirements?
——————————————————————————-
CXControls‘ team of experts conduct comprehensive feed studies and concept design sessions from the very beginning to ensure that the final product meets the client’s needs and specifications.
Contact CXControls to start your project on the right foot!
With the requirements established, plan the layout of your control panel. Organise components logically for ease of use and troubleshooting. Allocate space, considering the size of components, clearances and potential expansions. Ensure cable management is considered.
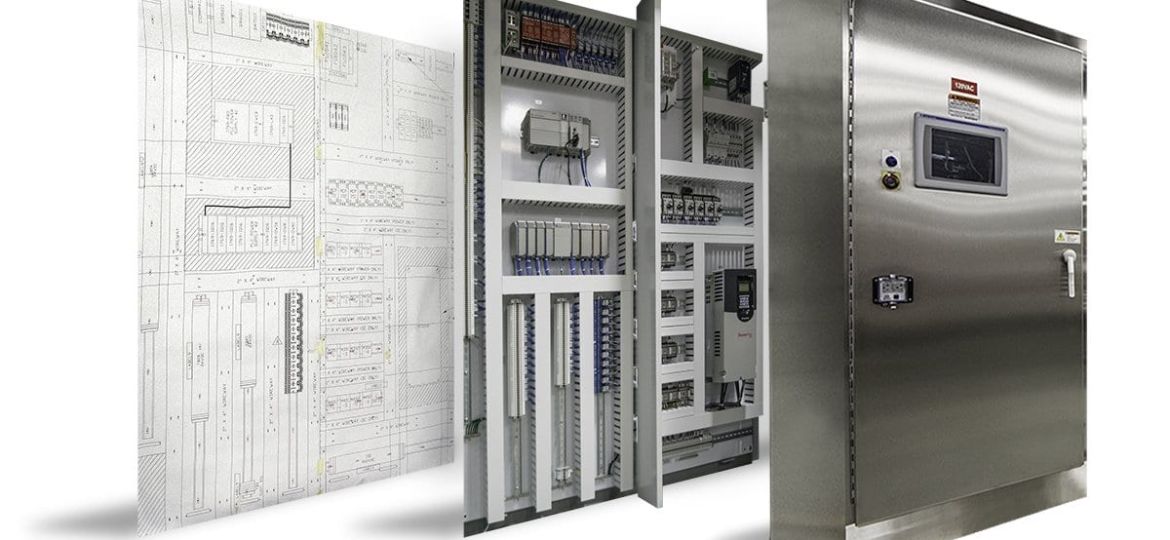
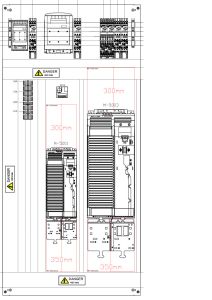
Utilising CAD Software, general arrangement drawings are produced to provide accurate representation to enable visualisation of the control panel and ensure the optimum layout of components and allow adequate clearances and space for future expansion.
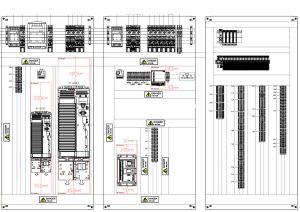
CXControls 2D general arrangement drawing.
Gather the necessary components and materials based on your layout plan. Ensure compatibility and suitability for the operating environment, project needs and budget.
Considerations:
Control Devices: Switches, buttons, knobs, and touchscreen displays.
Input/Output Modules: Modules compatible with the control devices and sensors to be used, ensuring sufficient capacity and flexibility for expansion.
Enclosures: Enclosures that provide adequate Ingress Protection (IP rated) against environmental factors such as dust, moisture, and temperature variations. Materials like stainless steel or polycarbonate should be considered for durability against environmental conditions and corrosive substances.
Mounting Hardware: Sturdy mounting hardware to secure components within the enclosure, preventing movement or damage during operation.
Wiring: High-quality wiring and cables capable of handling the required voltage, current levels and colour coded to the required standards.
Connectors and Terminal Blocks: Connectors and terminal blocks that are reliable and easy to install, facilitating efficient wiring and maintenance and in some cases isolation of signals.
Safety Components: Fuses, circuit breakers, emergency stop buttons, and safety interlocks to protect equipment and personnel from potential hazards.
Indicators and Displays: Indicators and displays monitor system status and display critical information. Consider factors like visibility, readability, and compatibility with control devices. Also consider human factors such as consistent colour coding, symbols, alarms etc.
Communication Modules: Integrate communication modules to connect the control panel to external devices or networks, enabling remote monitoring and control capabilities.
Labelling and Marking: Label components, terminals, and wires to ensure easy identification and troubleshooting later. Use standardised symbols and markings for consistency.
Environmental Considerations: When selecting materials and components, consider temperature, humidity, vibration, chemical exposure, or other hazards.
Regulatory Compliance: Ensure all components and materials meet industry standards and regulatory requirements, including electrical safety, electromagnetic compatibility, and environmental regulations.
Scalability and Future Expansion: The control panel should be designed with scalability in mind, allowing for easy integration of additional components or expansion of functionality as needed.
Cost and Budget: Balance performance and quality with budget limitations, selecting components and materials that best meet the project’s requirements.
Control Panel Assembly
The first workshop task is to fabricate the enclosure which requires careful application of protective tape for marking out the holes required for indicators, push buttons, HMIs, fans etc. These require cutting out by drilling and using specialist hydraulic punches and cutting equipment to make the holes for the components. Additionally, the backplate of the enclosure must be marked out and holes drilled and tapped to enable the mounting of the cable trunking and DIN rail.
Carefully mount each component onto the backplate or DIN rail, referring to your General Arrangement (GA) for reference. Use the appropriate mounting screws or clips to secure components and prevent movement or displacement during operation.
Additionally, before the backplate is wired, all push buttons indicators etc. Would be mounted in the panel facia ready for wiring and the backplate is fitted into the panel.
Generally, wires are bunched into looms and numbered according to the panel schematics. They are then stripped and crimped with the appropriate end connector and terminated to the components at one end. The wires are then formed within the trunking and terminated at the destination point of a component or out of the panel to the panel facia. Careful consideration needs to be given to ensure correct wire types, colour coding and sizing are used. This process is continued until wiring is completed.
The backplate is then fitted into the enclosure and the remaining wires are loomed to the door mounted components and wired according to the schematics.
Take care to ensure proper polarity and connection orientation where applicable. Double-check connections to avoid any wiring errors affecting the panel’s functionality. Ensure all cable idents are visible and correct.
Traffolyte identification labels are fitted to the panel facia to complete panel manufacture.
Control panel is now ready for testing in line with the test specification developed during design.
If the panel contains programmable devices such as a PLC then the integrated programme that has been developed offline will be loaded ready for functional testing at the factory.
See future blogs regarding Software Development, Integration and Testing. (Coming soon)
To Conclude
Building a control panel requires expertise, attention to detail, and a methodical approach. Following these steps will help you understand the basic formula of building control panels that will help ensure:
- The requirements are met.
- Standards are maintained.
- Compliance with legislation.
- Reliable performance.
![]()
With CXControls, you benefit from more than just industry-leading expertise. Our team is dedicated to understanding your unique challenges and delivering tailored solutions that ensure safety in design and operability. We work with the latest technology to ensure that our control panels are functional and future-proofed against the ever-evolving demands of Industry.
Our Control panel solutions along with our Software System Integration services and Data aggregation expertise ensures a clients process is controlled safely, efficiently and within specification whilst providing key data and reports to the stakeholders of an organisation, such as plant efficiency, energy and waste consumptions, predictive maintenance alarms and overall plant performance.
ALWAYS AVAILABLE DATA ┃ WHERE YOU WANT IT ┃ WHEN YOU WANT IT
Partnering with CXControls means a commitment to excellence and ongoing support. Take the first step towards building operations that exceed expectations. Whether it’s a single control panel or a fully integrated site wide system, Contact CXControls!